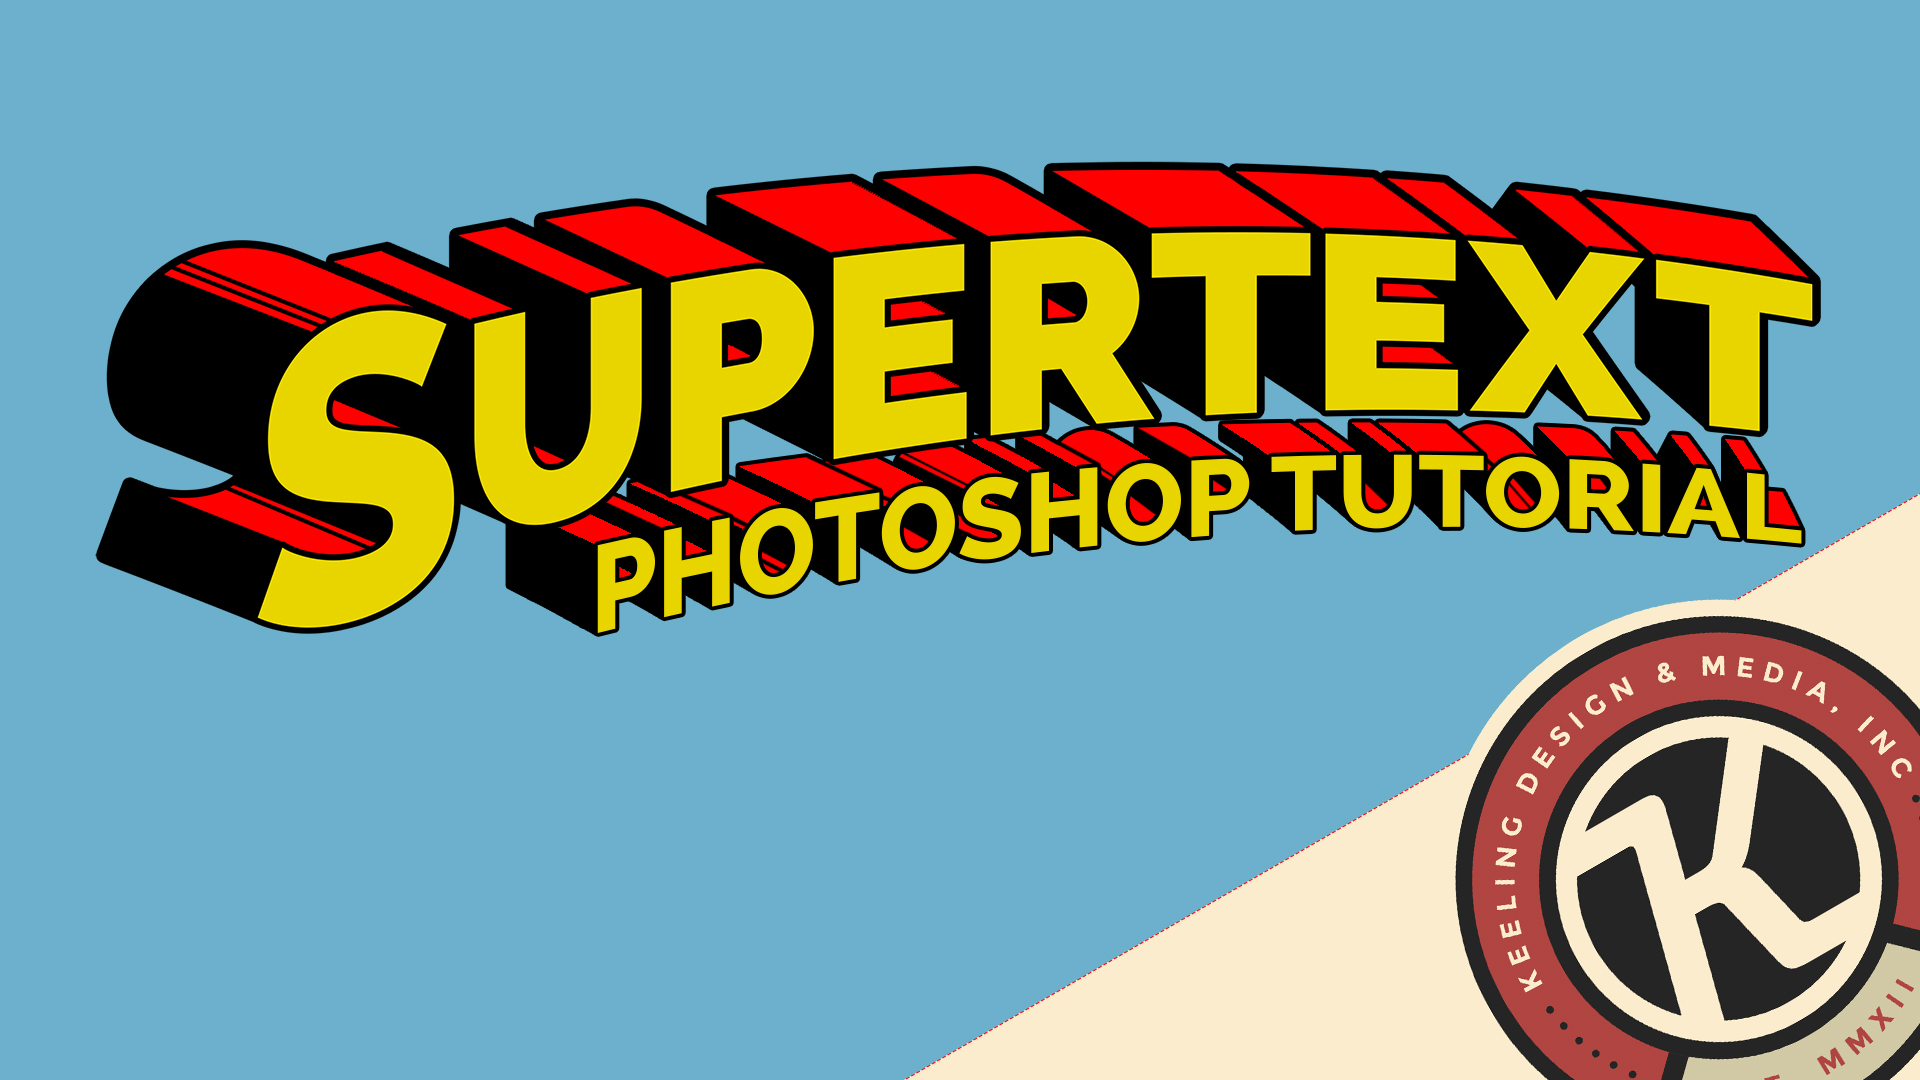
Looking for that classic “Superman” logo look from the comic book covers? Photoshop has a bunch of 3D capabilities now, but I always hate taking the time to render things when I’m in a hurry. In this tutorial we use some simple techniques to “extrude” our text just by using layer styles and Photoshop’s “Transform Again” functionality.
Grab the font I used and download the PSD file to inspect things further. You’ll find useful layer styles and can poke around on your own!
Posted by: Doug Keeling
Comments:
Thank you for sharing your tutorials.
Thank you for this great tutorial!
What a awesome psd file! – Thanks!
Hi ! thanks for this great tutorial 🙂 Do you have another tutorial (or link) that explains the vintage / “grain” effect added at the beginning and end of the tutorial ? Thx
thanks for this great tutorial very helping GBU
Hi Doug! Great tutorial! thanks. BTW, the .psd file is not downloading. Maybe it’s just me.
Thanks for the tutorial! Really helping!
Great Tutorial!!! Thank you for sharing!
I rewatch this video again, a good reminder for the technique! thank you!
So grateful for sharing everything needed to create my own work. Great video! I’ll subscribe
Thank you!
it’s funny that you did this over 3 years ago and I just found it. I know just enough photoshop to be dangerous, but your tutorials are very informative and easy to follow.
this was exactly the tutorial that I needed for an animated font that I needed to create for a portion of a pinball mod that I’m working on. thank you very much!
thanks for sharing. you are good
Hey Doug! Thanks so much for this simple and thorough tutorial. I haven’t used Photoshop for a couple of years, but I was done with this tutorial and creating my own stuff in under an hour. 🙂
Thanks for the tutorial, Doug. Can’t seem to download the PSD file, I think there might be a problem with the link.
Can I use it when making YouTube thumbnails?
Leave a response: